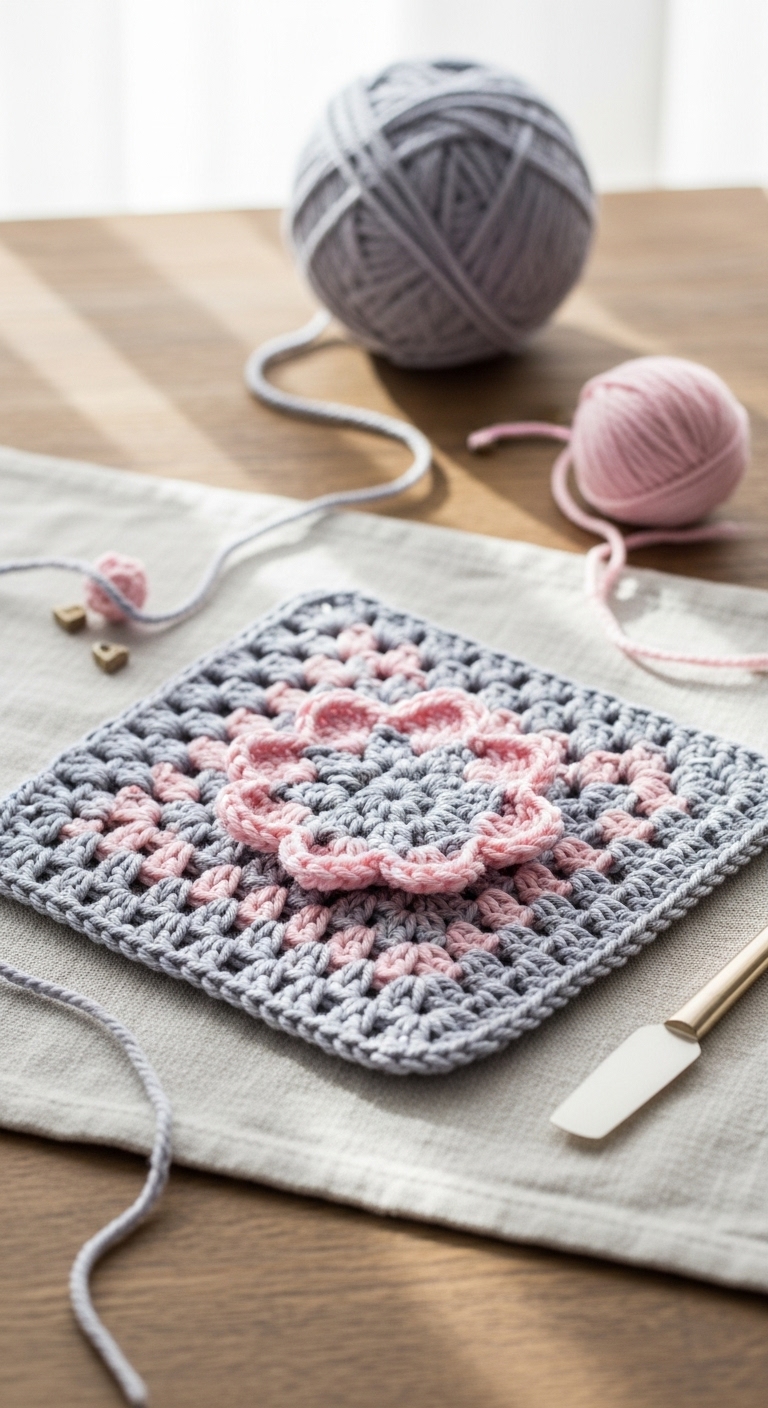
Fountain Flower Crochet Granny Square Pattern Free
2. Introduction
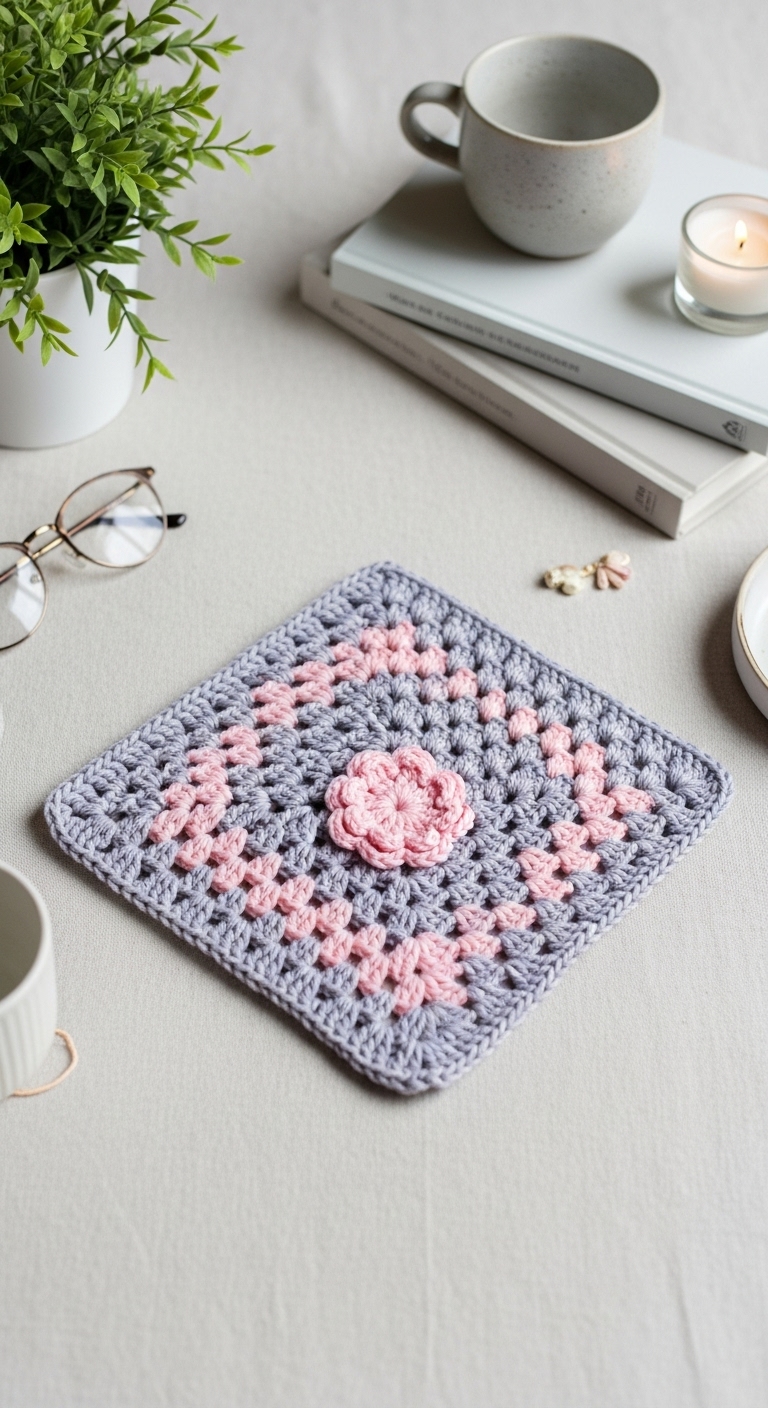
Welcome to the delightful world of crochet with our Fountain Flower Granny Square Pattern! This charming square measures approximately 10 inches by 10 inches, making it a perfect building block for a cozy blanket, a stylish bag, or even a decorative pillow cover. The beauty of the Fountain Flower design lies in its intricate floral motif, which adds a touch of elegance and vibrance to any project.
For this pattern, you’ll need a medium-weight yarn in complementary adult-friendly colors. Consider using a rich teal for the background, a soft lavender for the petals, and a sunny yellow for the center of the flower. These hues work together seamlessly, creating a sophisticated yet playful aesthetic. Not only is this project fun to make, but it’s also quick to complete—perfect for those who enjoy a satisfying finish without a long commitment. This pattern is beginner-friendly, so even if you’re new to crochet, you can confidently tackle this project. Plus, the finished squares make thoughtful gifts for friends and family or can be used to brighten your home décor during any season.

3. Materials Needed
– Yarn: Medium weight yarn (Category 4) in teal (200 yards), lavender (100 yards), and yellow (50 yards)
– Hook: 4.0mm crochet hook
– Marker: Stitch marker
– Needle: Tapestry needle for weaving in ends
– Optional extras: 1-inch safety eyes (if desired for embellishment)
4. Designer Notes / Tips
As you work on your Fountain Flower Granny Square, here are some helpful tips to ensure your project turns out beautifully:
– Stitch technique: The pattern features basic stitches like double crochet (dc) and slip stitch (sl st), but it also introduces a puff stitch for the flower petals, adding delightful texture. If you’re unfamiliar with puff stitches, don’t worry! They are simple to learn and create a lovely depth to your square.
– Assembly: If you’re planning to join multiple squares, consider using a whip stitch or slip stitch method for a seamless look. Lay your squares out before joining to ensure your colors are arranged to your liking.
– Yarn substitutions: If you can’t find the exact yarn colors suggested, any medium-weight yarn will work perfectly. Just ensure your yarn has a similar weight for consistent sizing.
– Gauge tips: Making a gauge swatch is a great way to ensure your square turns out the right size. Aim for 4 inches in diameter for your finished flower motif.
– Safety considerations: If making this granny square for children, consider omitting embellishments like safety eyes, or securely embroidering features using black embroidery thread instead.
5. Pattern Instructions
Fountain Flower Granny Square Pattern
Foundation Round
Round 1: Ch 4, join with sl st to form a ring. (4)
Round 2: Ch 3 (counts as dc), 11 dc in ring. Join with sl st to top of ch 3. (12)
Flower Petals Round
Round 3: Sl st to next dc, ch 3 (counts as dc), [puff stitch in next dc, ch 1] repeat around. Join with sl st to top of ch 3. (12 petals total)
Background Round
Round 4: Join teal yarn, ch 3, 2 dc in same st, *3 dc in next ch-1 space; repeat from * around. Join with sl st to top of ch 3. (36 dc)
Final Round
Round 5: Sl st to first space, ch 1, sc in same space, *[ch 2, sc in next space]; repeat from * around. Join with sl st to first sc.
Finishing
– Weave in all ends using your tapestry needle.
– If desired, block your granny square to ensure it lays flat.
6. Closing & Social Engagement
I’m excited for you to bring the Fountain Flower Granny Square to life! Don’t forget to share your finished squares or any projects you create using them in the comments below. What color combination will you try? I can’t wait to see the creativity in your work, so please tag me on social media with your beautiful creations!