Crochet Cute Bat Amigurumi Free Pattern
2. Introduction
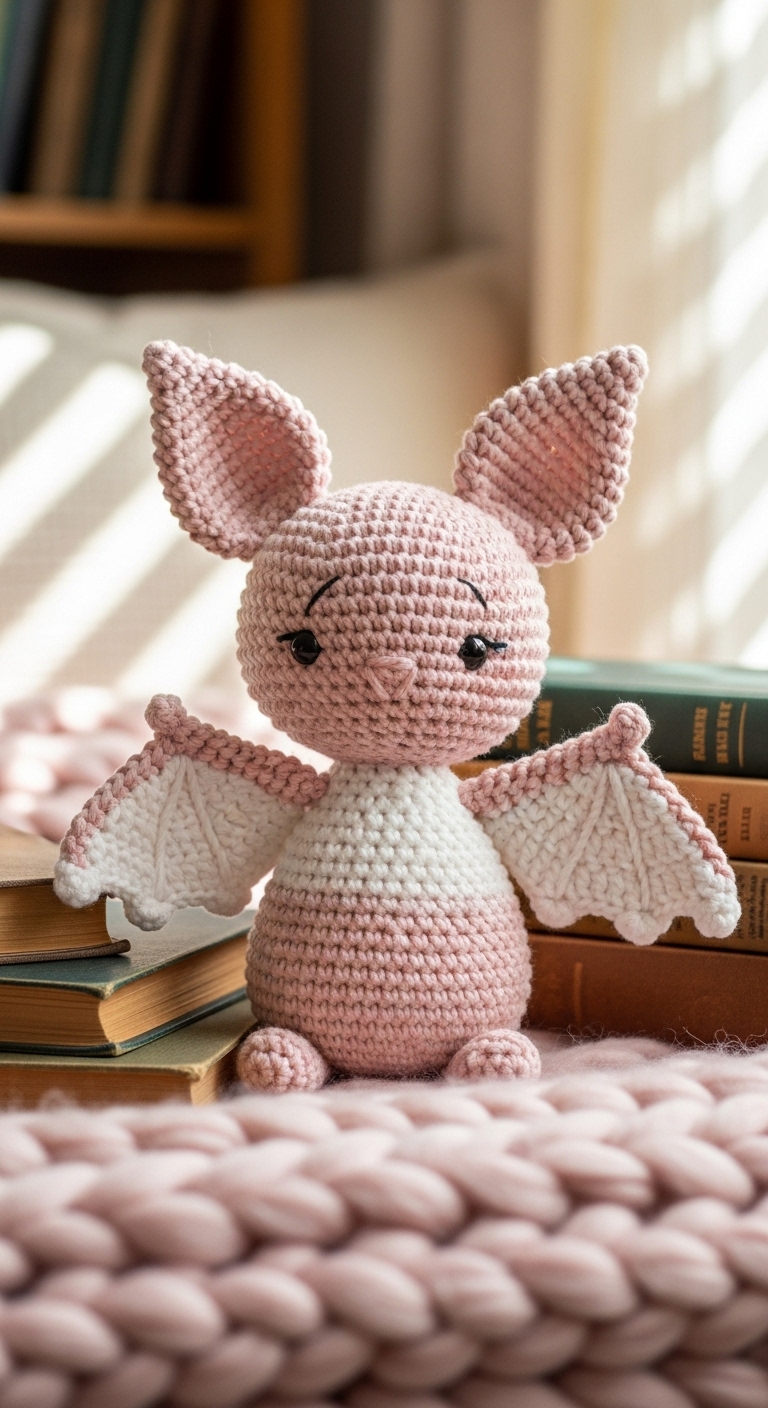
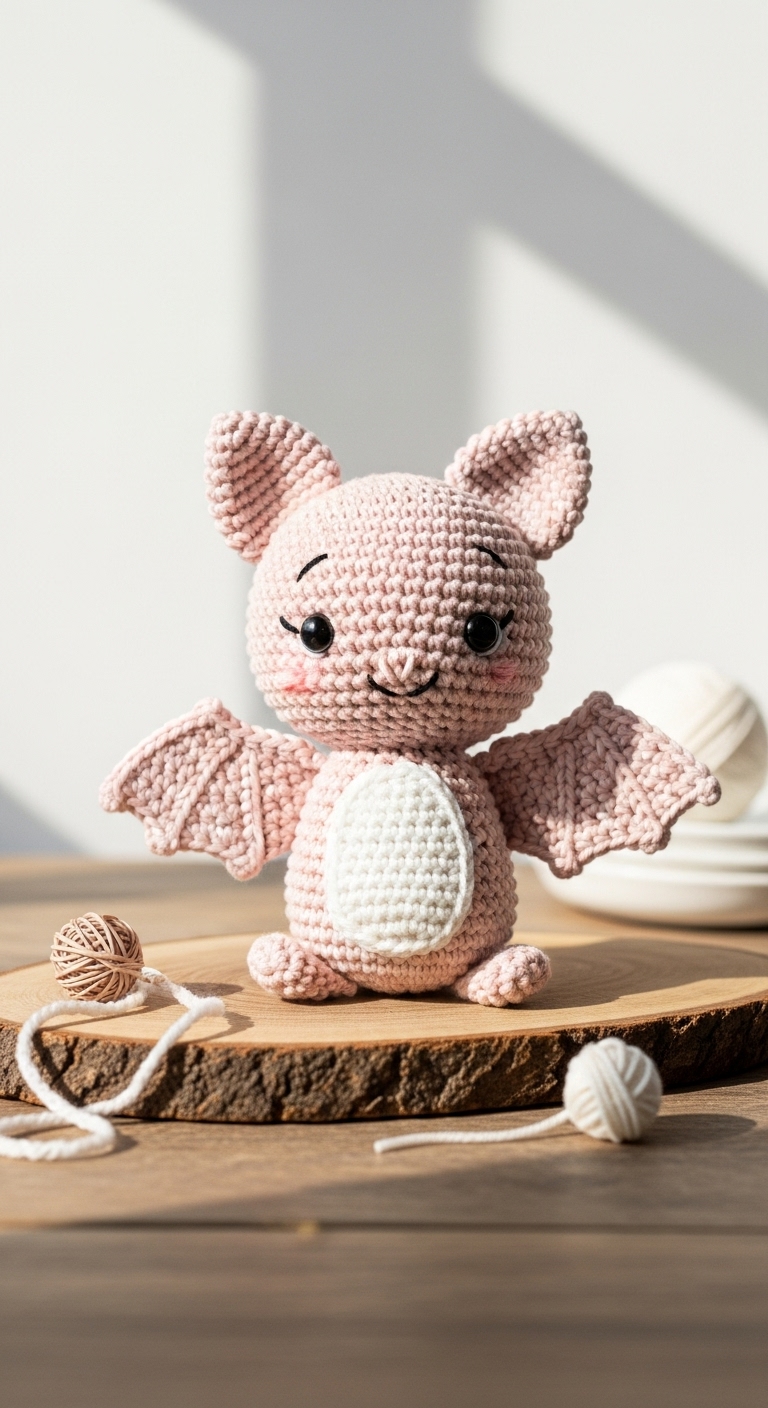
Are you ready to sink your teeth into a delightful new crochet project? This adorable Crochet Cute Bat Amigurumi is just what you need! Measuring about 6 inches from wingspan to toes, this charming little bat is perfect for adorning your home during the spooky season or as an endearing gift for friends who enjoy quirky crafts.
For this project, I chose a soft, worsted-weight yarn in rich colors like deep purple, charcoal gray, and a hint of soft lavender. These sophisticated colors not only enhance the bat’s charming features but also make it suitable for adults who appreciate a touch of whimsy in their decor. The pattern is beginner-friendly, making it a great first amigurumi project or a quick, satisfying make for seasoned crocheters. Whether you’re creating a fun Halloween decoration or a unique gift for a bat-loving friend, this pattern is sure to bring some joy!
3. Materials Needed
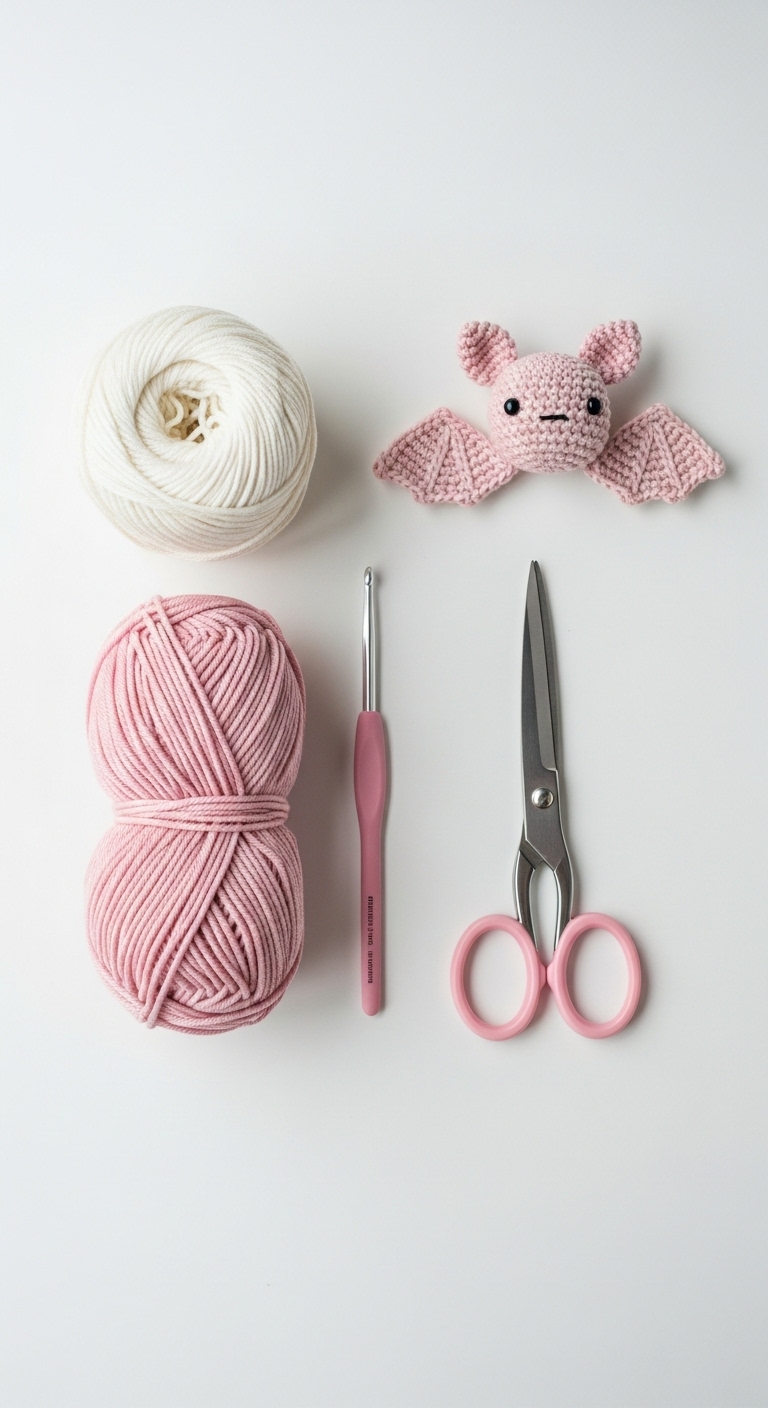
– Yarn: Worsted weight yarn in deep purple (about 100 yards), charcoal gray (about 50 yards), and soft lavender (about 25 yards)
– Hook: 3.5mm or 4.0mm crochet hook
– Eyes: 12mm safety eyes
– Stuffing: Polyester fiberfill stuffing
– Needle: Tapestry needle for sewing
– Marker: Stitch marker
– Optional extras: Pipe cleaners for added wing structure
4. Designer Notes / Tips
When working on this bat, you’ll be using basic stitches, so don’t worry if you’re new to amigurumi! You’ll primarily be using single crochet (sc) and a few increases and decreases. For a lovely textured finish, try to maintain an even tension. If you’re unsure about stuffing density, aim for a light but firm stuffing to give the bat a cuddly shape without being overly stiff.
As you assemble the pieces, use a stitch marker to keep track of your rounds, especially on the body and head. When placing the safety eyes, I suggest adding them between Rounds 12 and 13, about 6 stitches apart for the best look. If you’re making this for a child, consider embroidering the eyes instead for safety.
If you need a yarn alternative, consider cotton yarn for a more structured design, keeping in mind that this may affect the overall look and feel of your bat. Enjoy the process and don’t rush; amigurumi can be very therapeutic!
5. Pattern Instructions
For Plushies:
Head:
*Stuff the head firmly before closing.*
Body:
*Stuff the body before fully closing.*
Arms (make 2):
*Stuff lightly.*
Wings (make 2):
*You can add a pipe cleaner to the wings for extra stability if desired.*
Ears (make 2):
Assembly:
1. Attach the head to the body securely, using the long tail from the head.
2. Position and sew the arms on each side of the body.
3. Attach the wings on the back, ensuring they are balanced and secure.
4. Sew the ears to the top of the head.
5. Attach the safety eyes between Rounds 12 and 13 of the head if using them.
6. Weave in all ends and, if desired, lightly block your bat for a polished finish.
6. Closing & Social Engagement
Congratulations on creating your very own Crochet Cute Bat Amigurumi! I’d love to see your version! Leave a comment below with your thoughts or any questions you have. What color combination will you try? Feel free to share your finished bat on social media using the hashtag #CuteBatAmigurumi – let’s inspire each other with our creations!