Crochet Puff Stitch
2. Introduction
Welcome to the wonderful world of crochet puff stitches! In this article, we’re going to explore how to create a delightful and textured crochet piece using puff stitches. Whether you’re crafting a cozy throw pillow or a stylish accessory, the puff stitch adds a charming touch that is both eye-catching and comforting. Expect your finished project to be approximately 12 inches square for a pillow or a versatile scarf wrap.
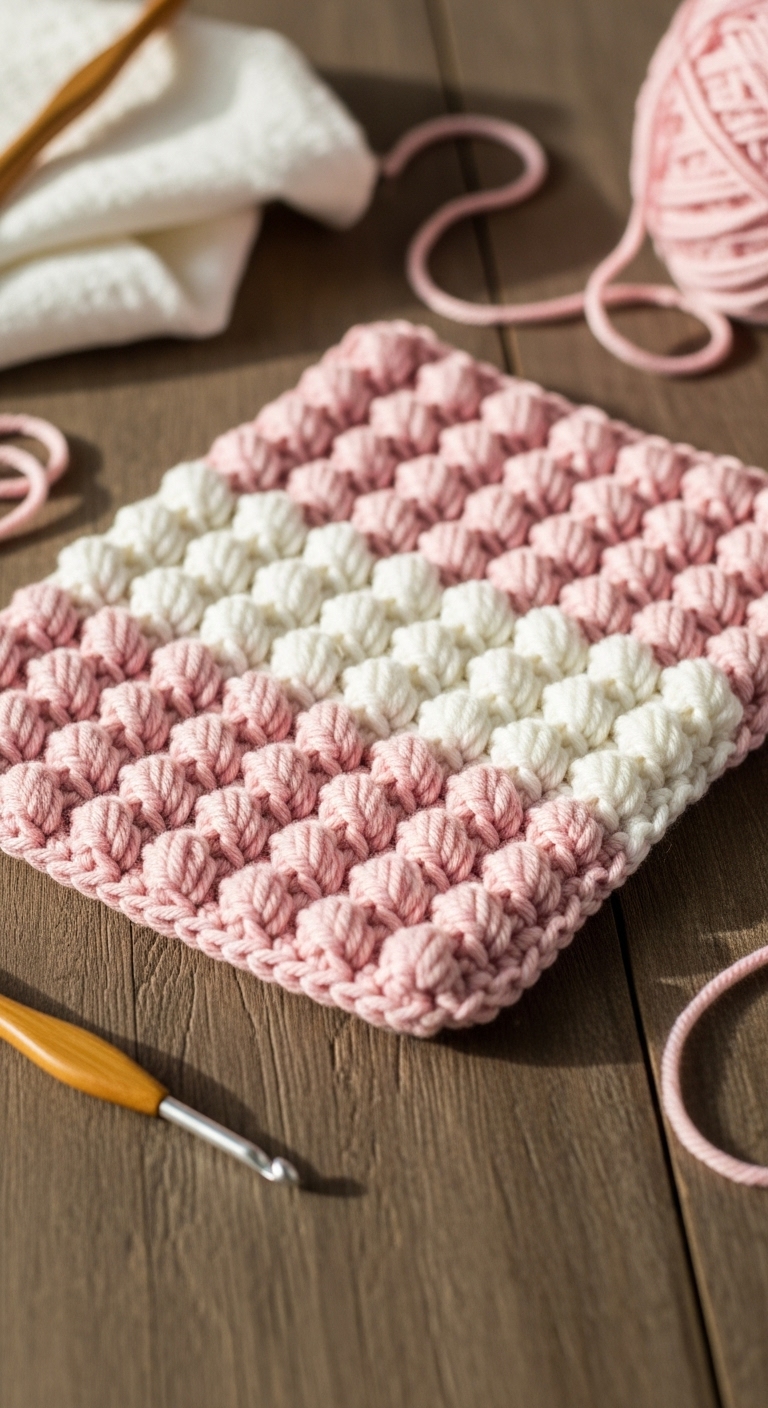
For this project, we’ll be working with soft, medium-weight yarn. I recommend using sophisticated colors like a rich navy blue, a calming gray, and a lovely cream to create a warm and inviting palette that is perfect for home décor or personal wear. The combination of these colors will not just enhance the visual appeal but also make it an inviting piece for any adult space.
The puff stitch is a fun and quick stitch that provides a unique texture to your work, making it feel both plush and cozy. Whether you’re a beginner looking to expand your skills or an intermediate crocheter wanting to refine your technique, this project is perfect for you. Plus, it makes for a thoughtful gift—ideal for the upcoming holidays or as a delightful surprise for a loved one!
3. Materials Needed
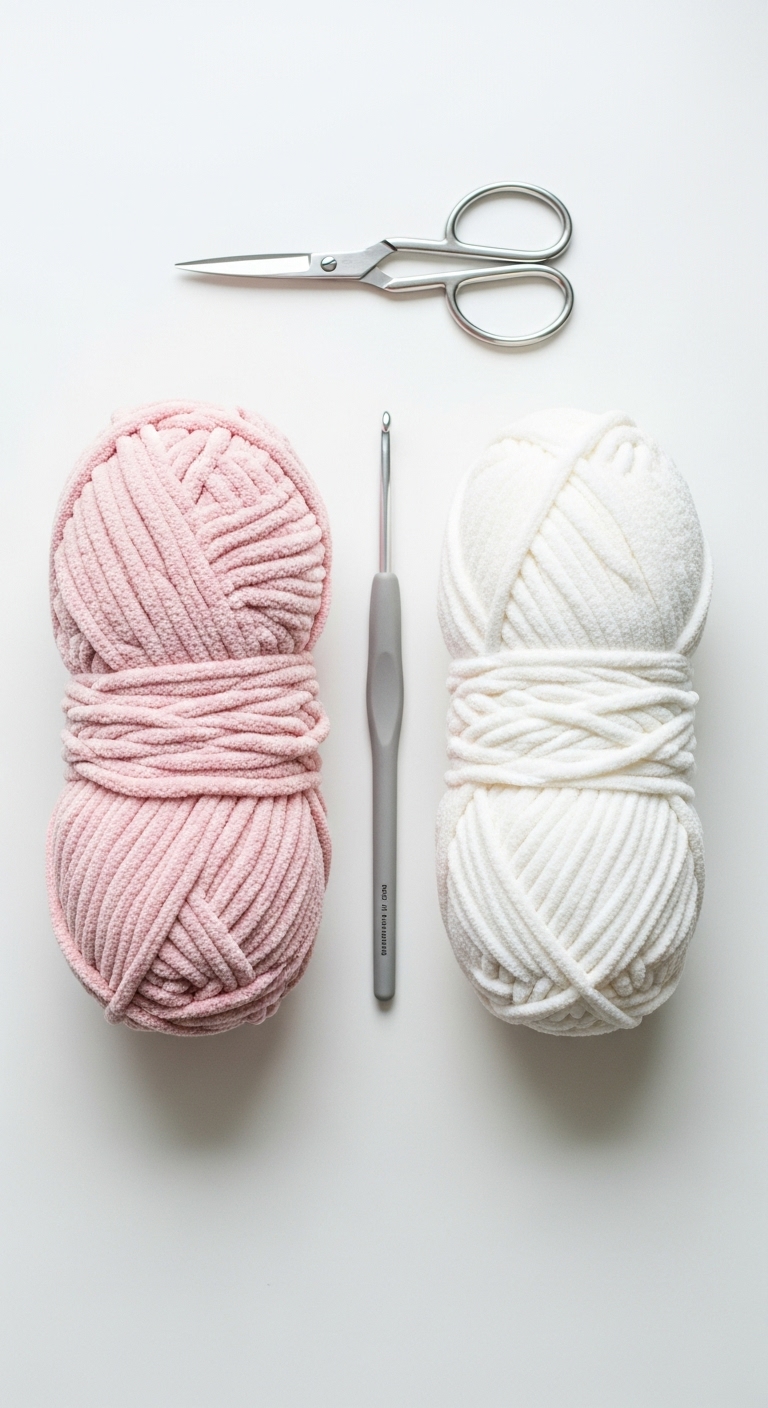
– Yarn: Medium-weight yarn (Category 4) in navy blue (approx. 200 yards), gray (approx. 100 yards), and cream (approx. 100 yards)
– Hook: 4.0mm crochet hook
– Eyes: Not applicable for this project
– Stuffing: Not applicable for this project
– Needle: Tapestry needle for weaving in ends
– Marker: Stitch marker
– Optional extras: None required, but you may want a yarn bobbin for color changes
4. Designer Notes / Tips
– Stitch technique: The puff stitch creates a lovely, textured effect by wrapping yarn multiple times around your hook before pulling it through. Don’t worry if your first few puffs seem a bit tight; it takes practice to find your rhythm. Remember, each puff stitch consists of a series of yarn overs and pulls through, which can feel a bit clunky at first but will result in a beautiful effect.
– Yarn substitutions: If you cannot find medium-weight yarn, you can use a lighter weight yarn with a corresponding hook size. Just be sure to adjust your stitch count accordingly!
– Gauge tips: It’s essential to check your gauge, especially if you plan to make a larger piece, as this can affect the size. Aim for 14 stitches and 16 rows in a 4-inch square in puff stitch.
– Safety considerations: If you’re making this for children, consider using child-safe yarn and avoid embellishments that could pose a choking hazard.
5. Pattern Instructions
For a Pillow:
Main Panel:
Puff Stitch Section:
Complete the Pillow:
– After the puff stitch rounds, continue with the following:
– When you reach the last two stitches, stuff lightly if you prefer a squishy pillow, or leave it flat for a decorative piece.
Assembly:
1. Weave in any loose yarn ends using your tapestry needle.
2. If you’re making two panels for a pillow, place them right sides together and crochet around, leaving a small opening to turn it right side out. Stuff and then finish the seam.
6. Closing & Social Engagement
I hope you enjoyed learning about the crochet puff stitch! It’s a wonderfully versatile technique that will undoubtedly add character to your projects. I’d love to see your version! Leave a comment below with your thoughts or questions. What color combination will you try? Don’t forget to share your finished piece on social media—let’s inspire each other to create more beautiful crochet items!